
How to clean the Cricut mat

 This article is brought to you by Lizzsews.


You've used your Cricut mat for weeks on end, don't tell me wrong. Your vinyl should stick to your mat, you shouldn't need to use extra tape. Get that dish scrub out and clean that mat!


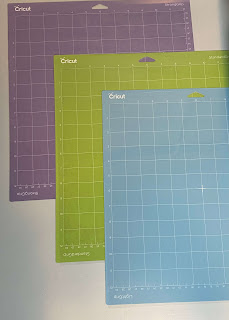
Cleaning your Cricut mat is something that you don't really think about when you're first starting out, but it is essential to do eventually.


Now, the tough part about cleaning the mat, you want to get all the dirt, hairs, and gunk off the mat, but without removing the sticky adhesive.

Everyone has their own method for cleaning their mats, I will share how I clean my mats and would love to hear how you clean yours in the comments!


Recommended read: 10 things you need to start cricut crafting today

What you'll need:

- Dish soap

- Scrub brush

- Dish cloth

- Cricut scraper

- Cricut mat (obviously)

How-to:

Start by wetting the scrub brush and adding some dish soap to your Cricut mat. Scrub your mat with the brush in circular movements, don't worry about how hard you're scrubbing, it will be okay. Don't use the scraper on the back of your scrub brush (I made that mistake when I was first learning).

When you feel that you have scrubbed enough, use the Cricut scraper to get all of the loose dirt, hairs, and gunk down to the bottom of the mat. Don't worry about the excess water on the mat, scrape it down to the bottom of the mat with all of the gunk. And yes, this water will be gross!

Now, rinse your mat under running water. Your mat should look clean now, if you feel that it is still dirty, feel free to go through the two steps again. Keep in mind here: your mat will not be sticky right away.

Take your mat and hang it over a dish cloth overnight, it should be (almost) good as new in the morning!

Note: By using the Cricut scraper, you're ensuring that you're not removing any of the sticky adhesive from the mat.

Tips for preserving your mat:

- Use the Cricut brayer or scraper to adhere your materials to the mat

- Keep away from pets

- Use a separate mat for glitter cardstock

- Use a mat protector -no, this isn't something you need to purchase. You know that sheet that comes on top of your mat when you purchase it? Yeah, that one, keep it! Use this to put on your mat when you're not using it, I don't know about you, but no one told me this when I started!


Recommended read: What is the Cricut Brayer used for
Recommended read: What is an SVG


Leave a comment below and let me know what size hoop you have. And don't forget to subscribe to stay up to date with all of Lizzsews new articles. See you next time!

Comments

Popular posts from this blog

10 Things You Need To Start Machine Embroidery Today

This article is brought to you by Lizzsews Thinking about diving into machine embroidery but not sure where to start? Here’s everything you need to know to get started—without spending a fortune. Interested in sewing?  Recommended read: 10 Things You’ll Need to Start Sewing! 1. Get Yourself an Embroidery Machine You can start with any embroidery machine, but here are a few great beginner-friendly options: Brother SE600 – A combo machine that sews and embroiders. It’s affordable, versatile, and my top pick for beginners. Brother PE550D – Embroidery-only and comes with built-in Disney designs. Super cute! Brother SE1900 – A step up, with more advanced features and a larger embroidery area. 💡 Tip: Set a clear budget before buying, b uy the largest hoop your budget allows . While the SE600’s 4x4 hoop is great for starters, you may outgrow it quickly—and the next hoop size up is a big price jump. Recommended read: How to Choose the Right Embroidery Machine   ...

8 Reasons Why Your Upper Thread Is Shredding On Your Embroidery Machine

 This article is brought to you by  Lizzsews . Here are some reasons why your top thread might be shredding while you’re embroidering! Starting machine embroidery is definitely a challenge, and troubleshooting is hard.  Recommended read: 10 Things you need to start machine embroidery today Often when your top thread is shredding, it’s caused by when the thread goes through the eye of the needle or while it’s going through the thread guides.  1. A dull or bent needle How long has it been since you’ve changed that needle? It might be time to swap it out! A needle only lasts about 8-10 hours of stitching, this amount of time may vary depending on what you are making. It’s good to have lots of needles on hand. Recommended read: When should I change the needle for machine embroidery 2. Are you using the right needle for the project? Are you embroidering heavier fabrics? Like denim or leather? If so, you’ll want to use a heavier needle size like 90/14. If you’re just...

Guide To The Three Main Machine Embroidery Stabilizers

This article is brought to you by  Lizzsews . Here's everything you need to know about the three main types of machine embroidery stabilizers, what they're used for and how to pick the right one. 💡 Why Stabilizers Matter Stabilizers are essential in machine embroidery. They help support your fabric, prevent puckering , and ensure your design comes out clean and crisp. A stabilizer is placed underneath your fabric. Some special ones, called toppers , go on top, but these are only used for certain materials, like towels or blankets. 👉 You always need a bottom stabilizer. Toppers are optional and only used for specific projects. 🏷️ The 3 Main Types of Stabilizers 1. ✂️ Cutaway Stabilizer Cutaway stabilizer is non-woven , permanent, and ideal for stretchy or knit fabrics like t-shirts, baby onesies, and fleece. Why it's great: Provides strong support Prevents pulled or sagging stitches Stays put even after washing and wearing Comes pre-cut or in ro...