
Snow Tri-Tray: How I made article 15

This article is brought to you by Lizzsews.


In today's article, I will guide you through how I made a fabric tray- with three sides. Follow along with this project and share your result in Lizzsews Facebook group.


In today's make, I wanted to create something but wasn't quite too sure about the dimensions of it. I had to make changes along the way. I wanted to sew a fabric tray, but this time I wanted it to have three corners rather than four.


Recommended read: How I made article series
Recommended read: How to sew a fabric tray


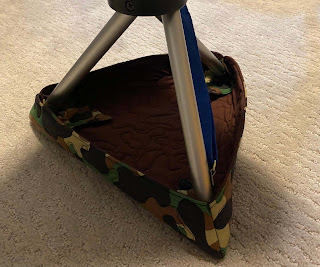
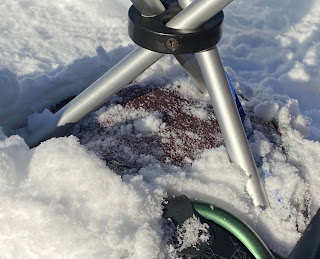
I wanted to have a base for my seat so it would stay on top of the snow rather than sink into the snow. I figured a tray would be perfect as it would have built-in spots for the feet of the chair to go into!


What I used:

Cotton fabric

Fleece (in replacement of batting)

Something to mark the fabric with

Parchment paper and pen

Iron

Rotary cutter and self-healing cutting mat

Sewing machine and supplies


The steps I took:

I started out by drafting my pattern, I drew it out on some parchment paper close to the exact finished size that I wanted and rounded the corners around each leg. Next, I took another piece of parchment paper and placed the other piece on top. I used a ruler to draw a straight line along each side and made the lines longer than the end of the original draft. 

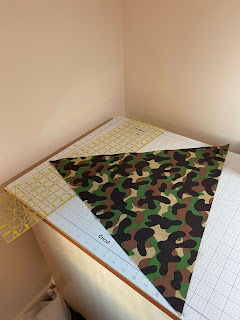
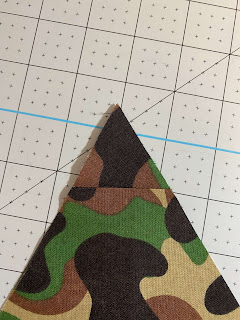
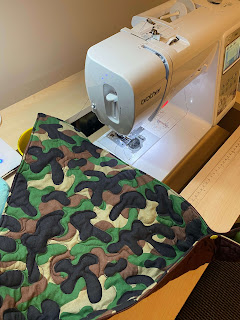
Now I had a new pattern that had pointed corners, a triangle. The triangle was not perfectly symmetrical, but that didn't matter. I ironed my fabric and placed the pattern on top of it. Using a chalk pencil and my seam gauge, I marked out dashed lines 2" away from the pattern. Then using my acrylic ruler, I connected all the dashed lines into one straight line. I did those two steps for all three sides. I made it so that each line was a little longer. Now I connected the lines into points, this is why I made the lines longer.

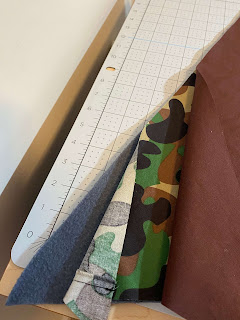
But, two of my corners ran off the fabric, the fabric just wasn't large enough. I cut the fabric to size and using the cut-off pieces of fabric, I sewed it to the corner. I ironed the seam down and cut the corner to size with the triangle and repeated with both.

I used the fabric rectangle as a pattern to cut out the other piece of fabric and the fleece. 

Recommended read: How to sew a fleece embroidered patch pillow

Using the same steps as in my how to sew a fabric tray article I created a tray. The only difference was that I stopped at step 5 (after the free motion quilt).


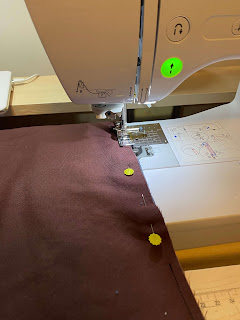
I made chalk lines 2 1/2" tall on each corner and pinned them.

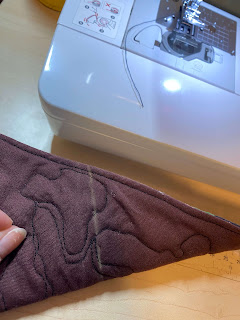
I folded them in and tested it with the seat, but it didn't fit quite right, it was too tight. After a couple more tries, I ended up with a ≈1 7/8" tall line and was happy with how it fit. I sewed along the line for each corner and flipped the tray, pushed out the corners and it was complete!

I'm very happy with the result and how the tray came together! I can't wait to try it on the snow.

*Update: It worked wonderfully on the snow!


*Update: I’ve been thinking about a name for this tray, and I came up with 'Snow Tri-Tray', what do you think it should be called? Leave a comment below and let me know! And don't forget to subscribe to stay up to date with all of Lizzsews new articles. See you next time!

Comments

Popular posts from this blog

10 Things You Need To Start Machine Embroidery Today

This article is brought to you by Lizzsews Thinking about diving into machine embroidery but not sure where to start? Here’s everything you need to know to get started—without spending a fortune. Interested in sewing?  Recommended read: 10 Things You’ll Need to Start Sewing! 1. Get Yourself an Embroidery Machine You can start with any embroidery machine, but here are a few great beginner-friendly options: Brother SE600 – A combo machine that sews and embroiders. It’s affordable, versatile, and my top pick for beginners. Brother PE550D – Embroidery-only and comes with built-in Disney designs. Super cute! Brother SE1900 – A step up, with more advanced features and a larger embroidery area. 💡 Tip: Set a clear budget before buying, b uy the largest hoop your budget allows . While the SE600’s 4x4 hoop is great for starters, you may outgrow it quickly—and the next hoop size up is a big price jump. Recommended read: How to Choose the Right Embroidery Machine   ...

8 Reasons Why Your Upper Thread Is Shredding On Your Embroidery Machine

 This article is brought to you by  Lizzsews . Here are some reasons why your top thread might be shredding while you’re embroidering! Starting machine embroidery is definitely a challenge, and troubleshooting is hard.  Recommended read: 10 Things you need to start machine embroidery today Often when your top thread is shredding, it’s caused by when the thread goes through the eye of the needle or while it’s going through the thread guides.  1. A dull or bent needle How long has it been since you’ve changed that needle? It might be time to swap it out! A needle only lasts about 8-10 hours of stitching, this amount of time may vary depending on what you are making. It’s good to have lots of needles on hand. Recommended read: When should I change the needle for machine embroidery 2. Are you using the right needle for the project? Are you embroidering heavier fabrics? Like denim or leather? If so, you’ll want to use a heavier needle size like 90/14. If you’re just...

Guide To The Three Main Machine Embroidery Stabilizers

This article is brought to you by  Lizzsews . Here's everything you need to know about the three main types of machine embroidery stabilizers, what they're used for and how to pick the right one. 💡 Why Stabilizers Matter Stabilizers are essential in machine embroidery. They help support your fabric, prevent puckering , and ensure your design comes out clean and crisp. A stabilizer is placed underneath your fabric. Some special ones, called toppers , go on top, but these are only used for certain materials, like towels or blankets. 👉 You always need a bottom stabilizer. Toppers are optional and only used for specific projects. 🏷️ The 3 Main Types of Stabilizers 1. ✂️ Cutaway Stabilizer Cutaway stabilizer is non-woven , permanent, and ideal for stretchy or knit fabrics like t-shirts, baby onesies, and fleece. Why it's great: Provides strong support Prevents pulled or sagging stitches Stays put even after washing and wearing Comes pre-cut or in ro...