
How to sew scrunchies

This article is brought to you by Lizzsews


Scrunchies are always the best go-to way to put up your hair. They are timeless and always stylish. Taking a little amount of time and supplies they are an awesome sewing project too.

What you’ll need:

Cotton fabric

1/4” elastics

Sewing machine and supplies

The steps to take:

1. Start out by cutting your fabric to 20” x 4” and a piece of elastic to anywhere between 7" to 8 1/2”.

I prefer to cut my piece of elastic to 7 1/2" and when sewing together I fold it over about 1/2".

2. Iron the long edges over about 1/4”


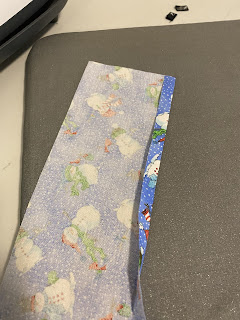
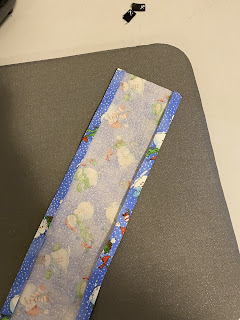
3. Fold the fabric in half hot dog style, long sides matching up, wrong sides together and iron. Open the fold back up.


4. Fold the fabric in half hamburger style, right sides together, matching up the short ends and sew. When you sew here make sure that you undo the 1/4" folds that you have ironed! You should now have a loop.

5. Sew the elastic together to create a loop.

You can remove the sewing attachment here as it will make it easier to sew.


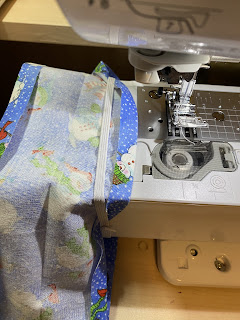
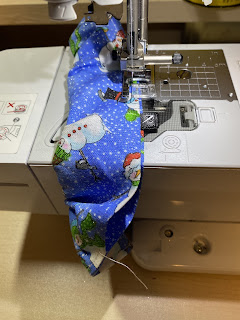
6. Place the fabric loop around the sewing machine arm wrong side facing up. Slide the elastic on top of it and fold the fabric over the elastic - it might be easier to place the elastic on before the fabric. Sew along the edges folded to each other close to the edge and continue to move the elastic and fabric as you sew into the correct positioning.


If you would like to add a branding label, do so here before sewing all of the way around.

Recommended read: How to make branding labels/tags


Recommended read: How to sew treat bags

Leave a comment below and let me know if you made some scrunchies! And don't forget to subscribe to stay up to date with all of Lizzsews new articles. See you next time! 🌝

Comments

Popular posts from this blog

10 Things You Need To Start Machine Embroidery Today

This article is brought to you by Lizzsews Thinking about diving into machine embroidery but not sure where to start? Here’s everything you need to know to get started—without spending a fortune. Interested in sewing?  Recommended read: 10 Things You’ll Need to Start Sewing! 1. Get Yourself an Embroidery Machine You can start with any embroidery machine, but here are a few great beginner-friendly options: Brother SE600 – A combo machine that sews and embroiders. It’s affordable, versatile, and my top pick for beginners. Brother PE550D – Embroidery-only and comes with built-in Disney designs. Super cute! Brother SE1900 – A step up, with more advanced features and a larger embroidery area. 💡 Tip: Set a clear budget before buying, b uy the largest hoop your budget allows . While the SE600’s 4x4 hoop is great for starters, you may outgrow it quickly—and the next hoop size up is a big price jump. Recommended read: How to Choose the Right Embroidery Machine   ...

8 Reasons Why Your Upper Thread Is Shredding On Your Embroidery Machine

 This article is brought to you by  Lizzsews . Here are some reasons why your top thread might be shredding while you’re embroidering! Starting machine embroidery is definitely a challenge, and troubleshooting is hard.  Recommended read: 10 Things you need to start machine embroidery today Often when your top thread is shredding, it’s caused by when the thread goes through the eye of the needle or while it’s going through the thread guides.  1. A dull or bent needle How long has it been since you’ve changed that needle? It might be time to swap it out! A needle only lasts about 8-10 hours of stitching, this amount of time may vary depending on what you are making. It’s good to have lots of needles on hand. Recommended read: When should I change the needle for machine embroidery 2. Are you using the right needle for the project? Are you embroidering heavier fabrics? Like denim or leather? If so, you’ll want to use a heavier needle size like 90/14. If you’re just...

Guide To The Three Main Machine Embroidery Stabilizers

This article is brought to you by  Lizzsews . Here's everything you need to know about the three main types of machine embroidery stabilizers, what they're used for and how to pick the right one. 💡 Why Stabilizers Matter Stabilizers are essential in machine embroidery. They help support your fabric, prevent puckering , and ensure your design comes out clean and crisp. A stabilizer is placed underneath your fabric. Some special ones, called toppers , go on top, but these are only used for certain materials, like towels or blankets. 👉 You always need a bottom stabilizer. Toppers are optional and only used for specific projects. 🏷️ The 3 Main Types of Stabilizers 1. ✂️ Cutaway Stabilizer Cutaway stabilizer is non-woven , permanent, and ideal for stretchy or knit fabrics like t-shirts, baby onesies, and fleece. Why it's great: Provides strong support Prevents pulled or sagging stitches Stays put even after washing and wearing Comes pre-cut or in ro...