
ImpROCKster print: How I made article 14

  This article is brought to you by Lizzsews.


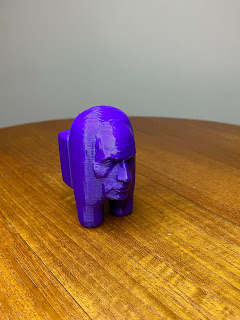
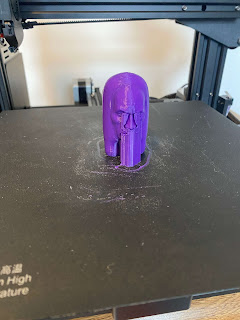
In today's article, I will guide you through how 3D printed Not just any 3D print… the impROCKster print. The Rock x Among Us. Follow along with this project and share your result in Lizzsews Facebook group.

Recommended read: How I made article series


What I used:

PLA filament

ImpROCKster print file

3D printer 

Cura (slicing software)


Recommended read: What is PLA

Recommended read: About my 3D printer

Recommended read: What is slicing in the 3D printing world


The steps I took:

I started by just exploring some 3D print files. I found this awesome print from Thingiverse, created by TheRealRussell. I sliced the file in Cura and adjusted the settings. I used MECH solutions PLA filament and these were the settings that I used:


200 nozzle temp

60 bed temp

0.2mm height

50mm/sec speed

15% infill - zig zag fill

Supports yes

Retracting set as per Cura's PLA default


I printed it out, removed all of the supports and the results were great!

Recommended read: Mythosaurs 3D print: How I made article 13

Recommended read: Snow Tri-Tray: How I made article 15


Leave a comment below and let me know if you made the ImpROCKster! And don't forget to subscribe to stay up to date with all of Lizzsews new articles. See you next time!

Comments

  1. You have Shared great content here about Art Printing Toronto I am glad to discover this post as I found lots of valuable data in your article. Thanks for sharing an article like this.

    ReplyDelete
  2. Extremely useful information which you have shared here about Slm 3d Printing Nelson This is a great way to enhance knowledge for us, and also beneficial for us. Thank you for sharing a blog like this.

    ReplyDelete
  3. Great post, your all points fully clarify, Printing Company bangalore These steps are very helpful for us. Thank you for providing such a valuable information.

    ReplyDelete
  4. You've posted a phenomenal and helpful snippet of data here. I'm thankful that you basically imparted this accommodating data to us. Kindly keep on being educated thusly. Much thanks for sharing it. 3d Printing Concrete

    ReplyDelete
  5. You've posted a phenomenal and helpful snippet of data here. I'm thankful that you basically imparted this accommodating data to us. Kindly keep on being educated thusly. Much thanks for sharing it. 3d Printing Concrete

    ReplyDelete
  6. The objective is always to do it once well, instead of working in a perpetual cycle of rescanning the object over and over again due to poor planning. physicaldigital.com

    ReplyDelete

Post a Comment

Popular posts from this blog

10 Things You Need To Start Machine Embroidery Today

This article is brought to you by Lizzsews Thinking about diving into machine embroidery but not sure where to start? Here’s everything you need to know to get started—without spending a fortune. Interested in sewing?  Recommended read: 10 Things You’ll Need to Start Sewing! 1. Get Yourself an Embroidery Machine You can start with any embroidery machine, but here are a few great beginner-friendly options: Brother SE600 – A combo machine that sews and embroiders. It’s affordable, versatile, and my top pick for beginners. Brother PE550D – Embroidery-only and comes with built-in Disney designs. Super cute! Brother SE1900 – A step up, with more advanced features and a larger embroidery area. 💡 Tip: Set a clear budget before buying, b uy the largest hoop your budget allows . While the SE600’s 4x4 hoop is great for starters, you may outgrow it quickly—and the next hoop size up is a big price jump. Recommended read: How to Choose the Right Embroidery Machine   ...

8 Reasons Why Your Upper Thread Is Shredding On Your Embroidery Machine

 This article is brought to you by  Lizzsews . Here are some reasons why your top thread might be shredding while you’re embroidering! Starting machine embroidery is definitely a challenge, and troubleshooting is hard.  Recommended read: 10 Things you need to start machine embroidery today Often when your top thread is shredding, it’s caused by when the thread goes through the eye of the needle or while it’s going through the thread guides.  1. A dull or bent needle How long has it been since you’ve changed that needle? It might be time to swap it out! A needle only lasts about 8-10 hours of stitching, this amount of time may vary depending on what you are making. It’s good to have lots of needles on hand. Recommended read: When should I change the needle for machine embroidery 2. Are you using the right needle for the project? Are you embroidering heavier fabrics? Like denim or leather? If so, you’ll want to use a heavier needle size like 90/14. If you’re just...

Guide To The Three Main Machine Embroidery Stabilizers

This article is brought to you by  Lizzsews . Here's everything you need to know about the three main types of machine embroidery stabilizers, what they're used for and how to pick the right one. 💡 Why Stabilizers Matter Stabilizers are essential in machine embroidery. They help support your fabric, prevent puckering , and ensure your design comes out clean and crisp. A stabilizer is placed underneath your fabric. Some special ones, called toppers , go on top, but these are only used for certain materials, like towels or blankets. 👉 You always need a bottom stabilizer. Toppers are optional and only used for specific projects. 🏷️ The 3 Main Types of Stabilizers 1. ✂️ Cutaway Stabilizer Cutaway stabilizer is non-woven , permanent, and ideal for stretchy or knit fabrics like t-shirts, baby onesies, and fleece. Why it's great: Provides strong support Prevents pulled or sagging stitches Stays put even after washing and wearing Comes pre-cut or in ro...