
About my 3D printer

This article is brought to you by Lizzsews.


I have the Anycubic mega zero 2.0 3D printer. In my honest opinion, I really like the printer!

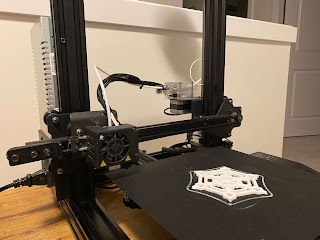
In this image, I had just finished a print on my printer and was so lucky I didn’t run out of filament!

   - FDM printer: fused filament fabrication or fused deposition modelling, is a 3D printing process. The process is when a thermoplastic material, filament, is used continuously. 


The large spool of filament is fed through the heated and moving extruder to be deposited on the growing print. 


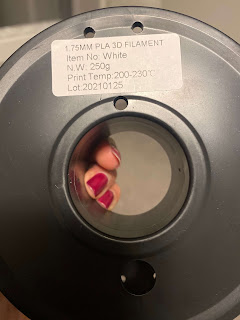
This is an example of one of my filament rolls


Extruder: this part of the 3D printer is responsible for drawing in, melting and pushing out the filament. ‘A fancy hot glue gun’ 

(This printer is a single extruder)


The melted filament then goes through the printer ‘head’: the hot-end. 


   - Magnetic printing hotbed: a magnetic sticker is used rather than paper or glue on the hotbed. It can be removed and bent to remove prints and reused again. The levelling of the bed has 4 positions. 


Recommended read: How to level the 3D printer bed


   - The printing build size area is 220mm x 220mm x 250mm. I find this is a good printing area as the majority of prints are smaller, I haven’t really gotten in large prints yet!


After using the Anycubic mega zero 2.0 printer for about a year now, I can say that I really like it! I’ve found that all printing problems have been a problem on my end rather than the fault of the machine lol. Levelling is as simple as can be and assembling the printer wasn’t too difficult although not easy. I would definitely recommend this machine. 


If you’re planning on using this machine, learn from my mistake: when slicing, if using Cura, make your own printer profile. Select the Anycubic i3 mega printer then change the dimensions to length + width: 220mm and height to 250mm.

Recommended read: What is slicing in the 3D printing world
Recommended read: How I made: Mythosaur 3D print

Leave a comment below and let me know what printer you have! And don't forget to subscribe to stay up to date with all of Lizzsews new articles. See you next time!

Comments

Popular posts from this blog

10 Things You Need To Start Machine Embroidery Today

This article is brought to you by Lizzsews Thinking about diving into machine embroidery but not sure where to start? Here’s everything you need to know to get started—without spending a fortune. Interested in sewing?  Recommended read: 10 Things You’ll Need to Start Sewing! 1. Get Yourself an Embroidery Machine You can start with any embroidery machine, but here are a few great beginner-friendly options: Brother SE600 – A combo machine that sews and embroiders. It’s affordable, versatile, and my top pick for beginners. Brother PE550D – Embroidery-only and comes with built-in Disney designs. Super cute! Brother SE1900 – A step up, with more advanced features and a larger embroidery area. 💡 Tip: Set a clear budget before buying, b uy the largest hoop your budget allows . While the SE600’s 4x4 hoop is great for starters, you may outgrow it quickly—and the next hoop size up is a big price jump. Recommended read: How to Choose the Right Embroidery Machine   ...

8 Reasons Why Your Upper Thread Is Shredding On Your Embroidery Machine

 This article is brought to you by  Lizzsews . Here are some reasons why your top thread might be shredding while you’re embroidering! Starting machine embroidery is definitely a challenge, and troubleshooting is hard.  Recommended read: 10 Things you need to start machine embroidery today Often when your top thread is shredding, it’s caused by when the thread goes through the eye of the needle or while it’s going through the thread guides.  1. A dull or bent needle How long has it been since you’ve changed that needle? It might be time to swap it out! A needle only lasts about 8-10 hours of stitching, this amount of time may vary depending on what you are making. It’s good to have lots of needles on hand. Recommended read: When should I change the needle for machine embroidery 2. Are you using the right needle for the project? Are you embroidering heavier fabrics? Like denim or leather? If so, you’ll want to use a heavier needle size like 90/14. If you’re just...

Guide To The Three Main Machine Embroidery Stabilizers

This article is brought to you by  Lizzsews . Here's everything you need to know about the three main types of machine embroidery stabilizers, what they're used for and how to pick the right one. 💡 Why Stabilizers Matter Stabilizers are essential in machine embroidery. They help support your fabric, prevent puckering , and ensure your design comes out clean and crisp. A stabilizer is placed underneath your fabric. Some special ones, called toppers , go on top, but these are only used for certain materials, like towels or blankets. 👉 You always need a bottom stabilizer. Toppers are optional and only used for specific projects. 🏷️ The 3 Main Types of Stabilizers 1. ✂️ Cutaway Stabilizer Cutaway stabilizer is non-woven , permanent, and ideal for stretchy or knit fabrics like t-shirts, baby onesies, and fleece. Why it's great: Provides strong support Prevents pulled or sagging stitches Stays put even after washing and wearing Comes pre-cut or in ro...