Thinking about diving into machine embroidery but not sure where to start? Here’s everything you need to know to get started—without spending a fortune.
Interested in sewing? Recommended read: 10 Things You’ll Need to Start Sewing!
1. Get Yourself an Embroidery Machine
You can start with any embroidery machine, but here are a few great beginner-friendly options:
-
Brother SE600 – A combo machine that sews and embroiders. It’s affordable, versatile, and my top pick for beginners.
-
Brother PE550D – Embroidery-only and comes with built-in Disney designs. Super cute!
-
Brother SE1900 – A step up, with more advanced features and a larger embroidery area.
💡 Tip: Set a clear budget before buying, buy the largest hoop your budget allows. While the SE600’s 4x4 hoop is great for starters, you may outgrow it quickly—and the next hoop size up is a big price jump.
Recommended read: How to Choose the Right Embroidery Machine

2. Find Embroidery Designs
You’ll need designs to stitch out! Here’s where to get them:
-
Check out my Etsy shop
-
Explore Creative Fabrica – great variety and affordable
-
Use the built-in designs on your machine to start
-
Learn how to transfer purchased designs to your machine
Recommended read: How to Transfer Purchased Designs To Your Embroidery Machine
3. Stock Up on Stabilizers
Stabilizers are essential—they prevent puckering and ensure your stitches stay crisp.
Here are the 3 main types:
-
Cutaway – Best for clothing and stretchy fabrics. I use this the most. Pre-cut sheets are super convenient!
-
Tearaway – Good for non-wearable items and lightweight designs.
🧵 "If you wear it, don’t tear it!" -
Wash-away (Water-soluble) – Perfect as a topping on towels or plush fabrics, to prevent stitches from sinking in.
Recommended read: Guide to the 3 Main Machine Embroidery Stabilizers
Recommended read: What is Tearaway Stabilizer?
4. Get Embroidery Thread
Not all thread is created equal! Cheap thread can shred and break easily.
I recommend:
-
New Brothread – Great quality thread and budget-friendly
-
Spool savers – Prevent unraveling
-
A thread rack or even just a shoebox to store your spools

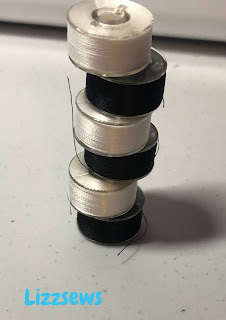
5. Don’t Forget Bobbin Thread
Pre-wound bobbins are a lifesaver for beginners! Less hassle and fewer issues like thread showing on top.
-
Most Brother machines (like the SE600) use 60wt or (like the PE550D) use 90wt bobbin thread
-
Embroidery thread is 40wt, so don’t use it in the bobbin!
-
Check that your bobbins are compatible!
Recommended read: Should You Use Prewound Bobbins?
6. Skip the Built-In Thread Holder
Trust me—don’t use it! It causes more problems than it solves.
Instead:
-
Place your thread in a cup behind your machine
-
Or invest in a thread stand
This gives the thread a longer, smoother path before it hits the guides, which reduces tangling.
Recommended read: Why You Should Use a Thread Stand
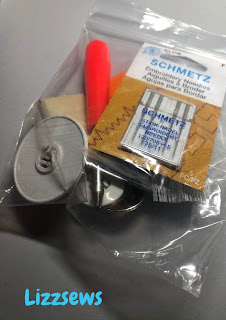
7. Stock Extra Needles
Your machine will come with some, but you’ll want extras for when they get dull or break.
Recommended read: When Should I Change My Needle?
8. Get Additional Hoops and Upgrade Your Scissors
Your machine comes with one hoop, but you may be interested in a smaller hoop or a larger repositionable hoop.
A repositionable hoop lets you do larger designs by moving the hoop mid-project.
⚠️ You’ll need embroidery software to split your designs to use the repositionable hoop. I recommend learning the basics before diving into this.
Recommended read: How to Hoop Fabric for Machine Embroidery
Additionally, Your machine might come with scissors, but curved embroidery scissors are a game-changer.
Great for trimming jump stitches
Essential if you want to try appliqué
Recommended read: How to Cut Those Pesky Jump Stitches
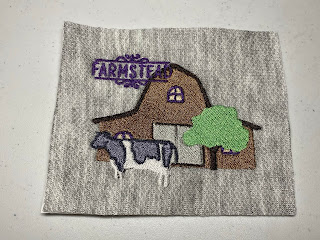
9. Invest in Blanks
Blanks are the items you'll actually embroider on—think t-shirts, towels, baby onesies, tote bags, and more.
Start small:
Look around your home for old shirts or fabric scraps to practice on
Shop at dollar stores or clearance racks
Purchase blanks from stores like Walmart, Michaels, or Joann
As you improve, you’ll figure out what types of items you love to embroider most!
Recommended read: Where to Get Blanks for Embroidery
10. Most Importantly—Patience!
Embroidery has a steep learning curve. Don’t get discouraged—it’s totally normal to make mistakes along the way. You’ve got this!
Recommended reads to help troubleshoot:
Top 5 Tools to Have for Embroidery
Machine Embroidery Troubleshooting Guide
Is Machine Embroidery Too Difficult for Me?
💬 Like this article? Leave a comment and let me know what you think!
📬 Don’t forget to subscribe to be the first to know when I post something new!
Thank you so much for your insights! They are very much appreciated and I can’t wait to start Embroidery.
ReplyDeleteThank you! Goodluck on your embroidery journey!
DeleteSpot on with this write-up, I truly think this website needs much more consideration. I’ll probably be again to read much more, thanks for that info.
ReplyDeleteTexas A&M Aggies embroidery
Thank you so much! That is very kind of you!!
DeleteThis is quite a helpful post for an ammeter like me
ReplyDeleteBuy Domestic Sewing Machine Parts